And my first sewing project from scratch without a pattern! That's quite an accomplishment for me (having a strong type A personality!) But I did it. I started out taking pictures and had planned on doing a tutorial, but I left my camera at home (sewing things are at my parents) on day two. So no picture tutorial. I will try to explain the process without the pics. I debated whether to do this tutorial at all, but decided to go with it. There are two reasons: I hope that it might help someone out there and to help me next time I make a purse.
I know the long list of things to do looks intimidating, but trust me, it's pretty easy (I mean I did it!) This was fun to make and I am sure I will be making more.
Supplies: Three coordinating fabrics (I started out with 1 yard each so I am not sure how much was needed. I would say 1/2 yard each for main fabric and lining and 1/4 yard for remaining fabric.)
Medium weight interfacing
Coordinating button
Start out cutting out the lining fabric to the shape you want. I just eyed the angles and when it was all cut out, I rounded off the corners (or you can leave the corners angled). You can fold it in half to make sure it is symmetrical. Then take some wax paper and trace the outline on it so you will have it for next time!
Using a different fabric from the lining, cut out a piece for the inside pocket. I am not exactly sure how big mine was, probably 6x8 inches. Fold the top edge down 1/4" twice, ironing after each fold then sew. Fold and iron each side and bottom 1/4" working clockwise and then fold again. With the inside of the pocket facing up on your sewing machine, sew around the sides and bottom close to the edge (so when you are done, the fold should lay flat). Then pin the pocket on the lining and sew around the sides and bottom, close to the outside of the pocket. If you want, sew a divider from top to bottom.
Then cut out the front and back piece for the exterior. Cut the front piece into three symmetrical panels. Using the middle piece, cut out the middle panel on the third fabric. Sew the panels together to form the front of the purse.
Attach the interfacing to the outside pieces. (I used an iron-on interfacing. I found it really easy to use. You can also apply interfacing on the lining fabric if you wish). Center the front side (the paneled side) to the back side, right sides together. Trim the back side; it will be a little bigger than the front because of sewing the panels together. Pin the pieces together and sew the two sides and bottom together. Make sure you back stitch.
Sew on a coordinating button, centered on the outside front piece towards the top (this way you won't see the thread on the lining).
Use the outside as a template to trim the lining. Pin lining pieces, right sides together and sew sides and bottom.
Now, for the straps. My straps were about 24 inches. I cut out two stripes, 25 x 4. Iron on the interfacing if you want a sturdier strap. Fold strap in half with right sides together and sew the long side of the strap. Turn right side out and iron with seam on the side.
Turn lining right side out and place inside the outer pouch. Make sure side seams are lined up. Pin edges together. Decide on the placement of the straps. They will need to be placed inside the pouch between the two layers. Make sure the straps aren't twisted. (The ends of the straps should be sticking out at the top where you are about to sew.) Sew all the way around the top edge of the purse, leaving a 5 inch gap for turning. Make sure you back stitch over the straps to make it more durable.
Turn the purse right side out and tuck the lining in side. Fold over and iron the gap and pin in place.
Cut out a 3/4" x 4" strip. Fold the strip in half and iron. Next, unfold the strip and bring the edges to the center line and iron both edges. Then fold in half on the first ironed line (there should be no raw edges showing; trust me this is much easier than trying to turn it right side out!)
Line up the strip with the button and pin in place. Top-stitch around the top of the purse and then you are done!
I made a fabric flower to add to the front. (Unfortunately I made it after I took the pics, so that didn't make it)
Wow, I didn't know the tutorial would be so long!!! I hope it helps and someone finds it useful. Next time I will remember my camera!
Here's a look inside. The pocket is divided into two sections.

And the back view:

Good luck with yours!


 Frame +


 Then I measured the ribbons and decided on the placement and hot glued them as well. Then added the back of the frame and I was done!!! Easy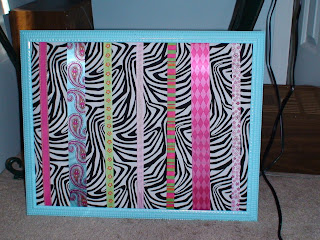


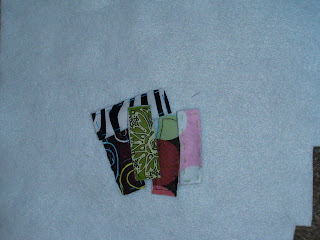


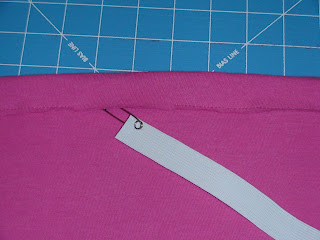 Overlap the elastic about an inch and pin it in place. Stitch the opening closed and sew from top to bottom of elastic to hold it in place. I also sewed from top to bottom on each side so the elastic won't twist.