Before you start cutting, make sure you measure the little one. Unfortunately, my niece's and nephew live about 2 hours away, so I went to Wal-Mart and bought a skirt for the appropriate size; in this case 12 months. I measured the length and waist band. I wanted the top section longer than the bottom. I guess the top section is about 2/3 bigger than the bottom. Be sure to add about a 1/4" for seam allowance and add extra length for the elastic. I added about 6" to the width to make it scrunchy. First, sew the side seam of the top band together. Then sew the tube for the elastic. Make sure you leave about a 2" gap to insert the elastic. For your bottom band, you can pretty much make it as long as you want; depending on how ruffled you want it. To make the ruffles, adjust your stitch length to the highest possible. Sew about a 1/4" from the edge. Do not backstitch and make sure to leave some extra thread on the ends. Pull the thread so the ruffles begin to form. Sew the raw edges together. Pin it to the top band with the right sides together working the ruffles so that they are consistent all the way around and sew. Double fold, iron, and pin the unfinished edge of the bottom band and sew to make the seam. At this point, it should look like this:

I apologize that I don't have pictures of the previous steps. I got a little frazzled when I realized I messed up and stopped taking them! As you can see, once I figured out it would work out for the little one I started taking pics again.
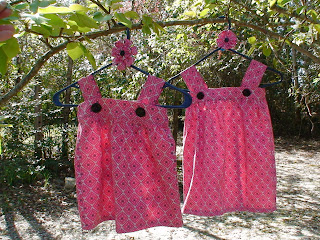
Thread the elastic through the tube. Before I finish the seam, I like to pull the overlapping ends of the elastic out far enough to sew them together. Then finish the tube and your done! Step back and visualize how cute the little one will be!
 This skirt wouldn't be complete without a cute matchy shirt! So I created three yo-yo flowers and sewed them on the shirt. (Oh my gosh, I can't get enough of those chubby arms!)
Here's the little model! She is so happy because I have finally given in and let her play with my phone! She is busy trying to figure it out!


And the fabric petal flower I made here matches perfectly. I am so glad they are finally staying in her hair!

I bought some fat quarters at Wal-Mart the other day. I am going to try to make some more of these fun skirts out of those. Hope it works!!! And I hope you enjoy!
Sarah
 I bought this book about a month ago. It has some really cute things in it. One of them being this adorable dress.